
I measured my gauge from a previously completed dishcloth but getting exact gauge isn't crucial to this pattern. It's just going to get abused anyway! It's also great practice for seaming because it really doesn't matter in the end if you screw it up... and you may get requests for these from friends or family, so that is a buttload of practice, let me assure you.
Here's the pattern:
Supplies:
Color A: varigated kitchen cotton remnants (sugar and cream, etc)
Color B: solid kitchen cotton remnants
Size 7 knitting needles
Gauge: 5 sts per 1" in Ballband Dishcloth stitch pattern.
When asked to slip a stitch, always do so purlwise.
yf = yarn forward (move yarn across needles towards you)
yb= yarn back (move yarn across needles away from you)
Cast on 69 stitches using Color A (the "outline" color) and the long-tail method. This means you will be starting with a wrong-side row.
Purl across that first row.
Begin following Ballband Dishcloth stitch pattern:
(multiple of 6 + 3)
Row 1: (color A) Knit across.
Row 2: Purl across.
Row 3: (color B) K4, slip 1, *K5, slip 1* repeat from * to * until the last 4 stitches, K4.
Row 4: K4, yf, slip 1, yb, *K5, yf, slip 1, yb,* repeat from * to * until the last 4 stitches, K4.
Row 5: P4, yb, slip 1, yf, *P5, yb, slip 1, yf,* repeat from * to * until the last stitches, P4.
Row 6: Repeat Row 4.
Row 7: (Color A) Knit across.
Row 8: Purl across.
Row 9: (Color B) K1, slip 1, *K5, slip 1,* repeat * to * until the last stitch, K1.
Row 10: K1, yf, slip 1, yb, *K5, yf, slip 1, yb,* repeat from * to * until the last stitch, K1.
Row 11: P1, yb, slip 1, yf, *P5, yb, slip 1, yf,* repeat from * to * until the last stitch, P1.
Row 12: Repeat row 10.
Repeat rows 1-12 twice. Next, work rows 1-8.
Knit one row.
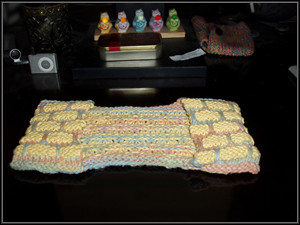
Bind off loosely.
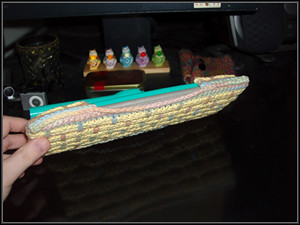
My swiffer measures 10" x 4" and my finished pieces average 14" x 5".
If your gauge is vastly different from mine, just make sure that your finished piece fits YOUR swiffer. You can adjust for any size variations when you sew the cover together.
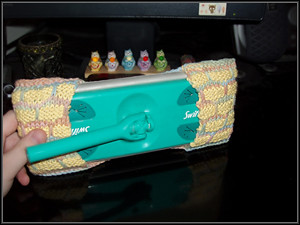
To assemble: fold your ends over about 2 inches on each side (or however much length you need to best fit your mop head.) Sew the sides together, creating a pocket on each end. Again, this doesn't have to be exact or match up perfectly. You do plan to use this thing, right? A tip: I found it easier to line up my edges by picking an enlongated slip stitch to use as a visual guide.

I recommend machine washing the cover before your first use, especially if you plan to use it dry. It helps set the size and makes the kitchen cotton absorbent.
I am really excited about this! I'm making more in better colors instead of these vomitous ones. However, this yarn does have lots of history as I've had it almost as long as I've been knitting. You can bet I'm glad it's gone now!